Table of Contents
-
The Browser Framework
-
How to customize your console?
-
How to write your own plugin?
-
How to write a wrapper?
-
How to write a panel?
-
How to write an icon provider?
-
How to write a contextual menu?
-
How to write a Drag and Drop action?
-
How to write a class providing information?
-
What is a TreeView?
-
How to build a console
-
The Browser framework configuration
-
Existing console examples
The Browser Framework
A Generic Framework
The main goal of the generic browser framework is to provide a
monitoring and management console which allows users to browse
and to interact with any kind of objects. This framework is generic
as it can be configured using a specific XML DTD grammar and
extended by developing plug-ins compliant with the Application Programming
Interfaces (API) defined by the Browser framework.
This framework is defined in order to provide an entity able to browse
a set of resources. The best adapted representation for such manipulation
is a tree structure. The tree GUI allows users to dynamically discover its
structure by using the mechanism of wrappers: If a wrapper is defined
for an entity type, the browser requests the given wrapper for obtaining
the children entities. Each entity is represented as a node of the tree.
So, the developer of plug-in determines the children of a specific entity.
This framework is designed in order to be:
-
Customizable/Extensible: Users can personalize the Browser
framework via an XML based language and some plug-ins.
-
Independent from technologies: You can develop plug-ins for any
Java technologies.
-
Non-intrusive: The Browser does not impose any modification to the
leverage application to manage.
-
Abstraction of the GUI aspects: You can write your own plug-in without
worrying about graphical aspects. The framework is in charge of those graphical aspects.
You just have to write your business code.
-
Composable: Users can compose their own consoles by assembling
several configurations (plug-ins).
The following list provides all customizable elements for each entity:
- The jar files containing the resources loaded by the Java Virtual Machine and
used by the plug-in. In other words, it can be either the archive
representing the plug-in or an archive containing the manageable entities.
- The wrapper to use for browsing the resource: This class wraps the
manipulated resource in order to discover its children. For example, the wrapper of a
naming service provides all objects bound to it.
- The icon to visually represent the object into the console.
- A panel to display distinctive information about the resource.
- A contextual menu to act on the resource. It defines a set of actions
available for users.
- An action to execute on Drag&Drop.
- A short description displayed in the status bar.
Architectural View
The following picture provides a global view of the architecture of the generic browser framework:
A console built using this framework is mainly composed of two elements:
- The implementation of the framework which is in charge of the main graphical aspects (Tree view, Drag&Drop support, ...),
the configuration parsing and the characteristics resolution.
- One or more plug-ins defining the behaviours of the console.
To sum up, the provided Browser framework does nothing alone. But you can add every kind of
behaviours using the mechanism of plug-ins.
User View
Here is an example of an instance of the generic Browser framework:
The Browser framework is at least composed of a "tree panel"
which browses what ever you wish. Moreover, you can plug a
"View panel" and a "Status Bar" on this tree panel in order to
have a complete console.
How to customize your console?
As we have ever seen in the section presenting the architectural view of the generic Browser,
this framework uses plug-ins to feed itself. The following picture presents the contents of a
plug-in.
A plug-in is a logical entity which provides a behaviour for the Browser framework.
It is composed of one or several Jar archives. It contains the set of resources
customizing one or more entities (The "entities" word means different types of objects or components).
So, we can find in such an archive a set of Java classes
compliant with the API defined by the Browser framework
(for wrappers, for panels, for actions, ...) and a set of files (icon files, configuration files).
The XML configuration files represent the link between the framework and the plug-in. Those files allow
the Browser to associate a configuration to a given type of object.
How to write your own plugin?
This part describes the way to create a new plug-in. Several interfaces have been defined in order to
write a plug-in. There is at least one interface per customizable element. All those interfaces can be
found in the org.objectweb.util.browser.api package of the Browser framework archive.
In this section, we will create a very simple plug-in for managing java.util.Map objects.
Through this example, any elements that can be configured with this framework will be covered. Of course,
all those elements are independent and they are not required together in the same configuration.
For example, you can customize an icon for a specific object without specifying any other elements
(panel, menu item, wrapper, ...). In a first time, we will create all the classes included in the plug-in and in
the following part, we will configure the way to use this plug-in.
The following picture is in fact the result we want to obtain by browing a java.util.Map instance.
The complete plug-in example is available in the example/map directory of the browser module.
This example can be executed using the ant tool. The compile Ant task compiles the map plug-in,
and the run task executes a example of console using this plug-in. Of course, the Browser framework has
to be built before compiling and running this example.
How to write a wrapper?
What is a wrapper?
A wrapper is an entity able to browse a type of objects. It wraps the object you want to manipulate and
provides the children of this object which will be displayed in the tree. So, the plug-in's developer
determines the children of the selected object.
The implementation class can be configured by using the wrapper element.
API
Two interfaces have been defined in order to create a wrapper:
- The first one (named
Wrapper) to have access to the wrapped object.
- The second one (named
Context) to provide the list of children to display. The returned type
is an array of entries (org.objectweb.util.browser.api.Entry). An entry is a simple structure
containing a name, an associated value and a context.
Example
public class MapContext
implements Wrapper, Context
{
/** The reference of the map to browse. */
protected java.util.Map map_;
/**
* Sets the wrapped object.
*/
public void setWrapped(Object object)
{
map_ = (java.util.Map)object;
}
/**
* Gets the wrapped object.
*/
public Object getWrapped()
{
return map_;
}
/**
* Returns an array of Entry representing the mappings contained in this map.
* @return The entries of the context.
*/
public Entry[] getEntries()
{
// Creates the array of entries.
Entry[] entries = new Entry[map_.size()];
// Populates the array with the mappings contained in the map.
Object[] keys = map_.keySet().toArray();
Object[] elements = map_.values().toArray();
for (int i = 0; i < entries.length; i++)
{
entries[i] =
new DefaultEntry(elements[i],
new DefaultName(keys[i].toString()), this);
}
return entries;
}
}
|
In this example, the wrapper provides the list of mappings contained in a given java.util.Map.
How to write a panel?
What is a panel?
A panel is an element which displays information about the selected resource in the tree. A panel may
be a simple Panel implementation or it may be composed of several view objects
(a list of Panel instances and/or Table instances).
This class can be configured by using the panel element.
API
Concerning the Panel interface, the first called method is the one which allows the developer to initialize
the panel depending on the selected object (selected()). Then, the tree obtains the panel by calling the getPanel()
method. And finally, when another node is selected, the tree notifies the current panel (unselected()).
So, you can for example save the filled data of the panel.
The other supported view element for the moment is the Table element. When you want to create a table, you just
have to provide the headers of the table (getHeaders() method) and the set of rows of the table (getRows() method).
Of course, the number of columns of the headers array and the rows array must be the same. So, the tree is in charge of the data
display, the icon search and the contextual menu search for each selected cell.
Example
In this example, the "view panel" is composed of a panel which provides a title and a table which lists the values of the selected map.
The first code example is a Panel implementation and provides the title of the main panel:
public class MapTitlePanel
implements Panel
{
/** The panel to provide */
protected javax.swing.JPanel panel_;
/**
* Creates a panel with a title displaying the map size.
*/
public void selected(TreeView treeView)
{
// Obtains the selected map.
java.util.Map map = (java.util.Map)treeView.getSelectedObject();
// Creates and customizes the panel.
panel_ = new JPanel();
panel_.setBackground(java.awt.Color.WHITE);
panel_.add(
new javax.swing.JLabel("Map Entries (" + map.size() + " entries)")
);
}
/**
* Returns the title panel.
*/
public JPanel getPanel()
{
return panel_;
}
/**
* When unselected.
*/
public void unselected(TreeView treeview)
{
// Nothing to do !
}
}
|
It just initializes a panel containing the size of the map in the selected() method and provides this panel in the
getPanel() method.
The second example is a Table implementation and provides the data contained in the selected map:
public class MapTable
implements Table
{
/**
* Returns the table headers.
*/
public String[] getHeaders(TreeView treeView)
{
return new String[]{"Keys","Values"};
}
/**
* Returns the rows of the table.
* Provides the list of elements contained in the map.
*/
public Object[][] getRows(TreeView treeView)
{
// Obtains the selected Map.
java.util.Map map = (java.util.Map)treeView.getSelectedObject();
// Obtains the map entries.
java.util.Map.Entry[] elements =
(java.util.Map.Entry[])map.entrySet().toArray(new java.util.Map.Entry[0]);
// Creates the array of entries.
Object[][] mappings = new Object[map.size()][2];
for (int i = 0; i < elements.length; i++) {
mappings[i] =
new Object[]{elements[i].getKey(),
new DefaultEntry(elements[i].getValue(),
new DefaultName(elements[i].getKey().toString()))};
}
return mappings;
}
}
|
The class requests the selected map to obtain its mappings and provides an array of entries containing those mappings.
How to write an icon provider?
What is an icon provider?
An icon provider is a class able to provide an icon which could be computed according to the state of the given object.
The other way to configure an icon for a specific node is to directly provide the URL of an icon file in a configuration file.
(See the icon element for more details).
API
This interface is very simple as it contains only one method to obtain an icon for the parameter object.
Example
public class MapIconProvider
implements IconProvider
{
/**
* Returns a javax.swing.Icon according to the given object.
* Provides an icon representing the size of the given java.util.Map.
*/
public Icon newIcon(Object object)
{
java.util.Map map = (java.util.Map)object;
return new NumberIcon(map.size());
}
}
|
This class provides an icon containing a number representing the size of the java.util.Map. This number is in fact the number
of mappings contained in this map.
How to write a contextual menu?
What is a contextual menu?
A contextual menu is a menu which is displayed when the user right-clicks on a specific node.
A contextual menu is composed of a set of items. Each item has to implement the MenuItem interface.
A contextual menu can inherit from superclass menus. In other words, you can define actions for a high level class
or interface type (named C), and when the tree will display a popup menu for a subclass
of the C class (at the Java type inheritance level), it will inherit actions defined for C class.
Moreover, each item can be defined directly for the selected object or for its children at the graphical tree level.
Indeed, some actions are simplier to use when they are visible by the children of the selected resource. For example,
it's simplier to use an action which removes an entry from a map when you can directly select the entry you want to remove.
For more information on the way to configure this features, have a look to the menu section and
the item section of the Browser descriptor page.
A contextual menu can be configured by using the menu element.
API
Concerning the MenuItem interface, the first called method is the getStatus() because
it allows to compute the status of the menu item depending on the state of the selected object. By the way,
you can create disabled button (MenuItem.DISABLE_STATUS) but also makes it invisible (MenuItem.NOT_VISIBLE_STATUS).
For example, this feature may be useful for managing component's life cycle. The "stop" action is enabled only if the component is already
started. So, you can prevent exception management because you disable the action instead of manage exception when the action is used in a
bad context. But most of the time, you want the button is accessible (MenuItem.ENABLE_STATUS). The second method, named
actionPerformed(), represents the action which is executed when the user activates the corresponding menu.
The framework offers a simple exception management which just displays the thrown exception in a dialog box, so you might
not care about exceptions throwable in your business code.
Example
Here is an example of action directly used by java.util.Map object:
public class MapClearAction
implements MenuItem
{
/**
* This item is enabled only if the map contains at least one entry.
*/
public int getStatus(TreeView treeView)
{
// Obtains the selected map.
java.util.Map map = (java.util.Map)treeView.getSelectedObject();
// Item enabled if this map contains at least one entry.
if (map.size()>0)
return MenuItem.ENABLED_STATUS;
return MenuItem.DISABLED_STATUS;
}
/**
* Removes all the mappings from this map.
*/
public void actionPerformed(MenuItemTreeView treeView)
throws Exception
{
// Obtains the selected map.
java.util.Map map = (java.util.Map)treeView.getSelectedObject();
// Removes all entries from this map.
map.clear();
}
}
|
This simple example class removes all the mappings of the selected Map. It just consists in obtaining the selected map and calling the
clear() method on this map.
The following example is an action defined for the children of the java.util.Map object provided by the Wrapper class:
public class MapRemoveEntryAction
implements MenuItem
{
/**
* Returns enabled status.
*/
public int getStatus(TreeView treeView)
{
return MenuItem.ENABLED_STATUS;
}
/**
* Removes the mapping for this key from this map.
*/
public void actionPerformed(MenuItemTreeView treeView)
throws Exception
{
// Obtains the selected map.
Map map = (Map)treeView.getParentObject();
// Obtains the entry to remove.
Object objectToRemove = treeView.getSelectedEntry().getName();
// Removes the entry.
map.remove(objectToRemove);
}
}
|
This class removes the selected entry from its map. It consists in
- Obtaining the map from which the entry has to be removed.
- Obtaining the selected entry.
- Removing the selected entry.
How to write a Drag&Drop action?
What is a Drag&Drop action?
The DropAction interface is used to define action in Drag&Drop context. This interface is instantiated when
the user drops an element on a specific node. This interface is defined for the target node which is selected during the drop action.
This class can be configured by using the drop-action element.
API
This interface contains only one method which is called when the user drops an object on a specific node.
Example
public class MapAddObjectOnDropAction
implements DropAction
{
/**
* Adds a new entry in the given map.
*/
public void execute(DropTreeView dropTreeView)
throws Exception
{
// Obtains the selected Map.
java.util.Map map = (java.util.Map)dropTreeView.getSelectedObject();
// Obtains the drag entry to add.
Object objectKey = dropTreeView.getDragSourceEntry().getName();
Object objectToAdd = dropTreeView.getDragSourceObject();
// Adds the entry.
map.put(objectKey, objectToAdd);
}
}
|
This example adds a mapping into the Map on which the user decides to drop the drag object. It consists in:
- Obtaining the selected Map. It is in fact the object on which the user drops the dragged object.
- Obtaining the entry to add. In other words, obtaining the drag source.
- Adding the dragged source entry into the dropped target map.
How to write a class providing information?
What is the Info interface?
The goal of the Info interface is to provide a short description of an entity.
This description will be displayed in the "Status Bar".
This class can be configured by using the info element.
API
This interface contains only one method which is called when a node is selected and such an interface is defined for this kind of node.
Example
public class MapInfo
implements Info
{
/**
* Provides the number of entries of the given map.
*/
public String getInfo(TreeView treeView)
{
// Obtains the selected Map.
java.util.Map map = (java.util.Map)treeView.getSelectedObject();
// Returns the map size.
return new String("Map size: " + map.size() + " entries");
}
}
|
This simple example indicates the number of mappings contained in the selected map.
What is a TreeView?
API
Those interfaces are provided by the tree and represent the state of the tree at a certain point during execution.
Those objects represent parameters for many methods of plug-in interfaces. The most general interface (named TreeView)
allows to obtain information about the tree. For example, you can obtain the selected node and its parent.
You can also, via this interface, add new entry into the tree, or also, refresh the tree.
Concerning the Drag&Drop, another information is required: The source object on which the Drag&Drop mechanism has been
initialized, that's why the interface used is the DropTreeView interface.
How to build your console
This part deals with the assembling of a console. It presents a code example which allows you to create a console to illustrate the Map plug-in.
public class Main
{
public static void main(String[] args)
{
// Creates the main frame.
JFrame frame = new JFrame("Browser GUI");
// Creates the view panel.
ViewPanel viewPanel = new DefaultViewPanel();
// Creates the status bar.
StatusBar statusBar = new DefaultStatusBar();
// Creates the tree.
DynamicTree tree = new DynamicTree();
// Populates the tree.
tree.addEntry("Object 1", new Object());
tree.addEntry("Object 2", new Object());
tree.addEntry("Map", new java.util.HashMap());
// Configures the tree.
tree.setNewBrowserProperty(new String[]{args[0]});
tree.setTargetPanel(viewPanel);
tree.setStatusBar(statusBar);
// Configures the main frame.
frame.getContentPane().setLayout(new BorderLayout());
frame.getContentPane().add(new DefaultTreePanel((DynamicTree)tree),
BorderLayout.CENTER);
frame.getContentPane().add(((DefaultViewPanel)viewPanel), BorderLayout.EAST);
frame.getContentPane().add((DefaultStatusBar)statusBar, BorderLayout.SOUTH);
frame.setDefaultCloseOperation(JFrame.EXIT_ON_CLOSE);
frame.pack();
frame.setVisible(true);
}
}
|
This example creates a complete console divided into three parts: a tree view, a status bar and a view panel.
It consits on creating all the elements, configuring the tree, and connecting them together.
The important points in this peace of code are the tree configuration and the tree filling up.
The Browser Framework Configuration
In order to configure your plug-in, you can have a look at the Browser descriptor page which presents
all the elements of the Browser configuration grammar.
The following example represents a configuration for a specific node (java.util.Map):
<node type-name="java.util.Map">
<jar url="file:build/lib/map-plugin.jar" />
<wrapper>
<code>org.objectweb.util.browser.plugins.java.MapContext</code>
</wrapper>
<icon>
<code>org.objectweb.util.browser.plugins.java.MapIconProvider</code>
</icon>
<panel>
<panel>
<code>org.objectweb.util.browser.plugins.java.MapTitlePanel</code>
</panel>
<table>
<code>org.objectweb.util.browser.plugins.java.MapTable</code>
</table>
</panel>
<menu>
<item label="Clear this map">
<code>org.objectweb.util.browser.plugin.java.map.MapClearAction</code>
<accelerator ctrl="true" char="c" />
</item>
<item label="Delete this entry" tree-child-visible="true">
<code>org.objectweb.util.browser.plugin.java.map.MapRemoveEntryAction</code>
<icon><icon-file url="delete.png" /></icon>
<accelerator ctrl="true" char="d" />
<mnemonic char="d" />
</item>
</menu>
<drop-action label="Add an object">
<code>org.objectweb.util.browser.plugins.java.MapAddObjectOnDropAction</code>
</drop-action>
<info>
<code>org.objectweb.util.browser.plugins.java.MapInfo</code>
</info>
</node>
|
This configuration allows one to obtain the following graphical
representation when browsing a java.util.Map instance:
We find again all the elements we have defined in the previous sections and we have specified in the XML declaration.
The Drag&Drop action allows one to add mappings into the map and when you select this map, you can see the information
displayed as defined in the configuration.
Moreover, you can notice that the Jar archive containing the plug-in classes has been specified in the XML configuration.
So, it is not required to add this archive into the classpath used to launch the console.
How does it work ?
When a Browser framework instance looks for a configuration for a selected node, it first looks for the configuration using the more specific object type
(java.util.HashMap in our case) and if no configuration is found, it computes the inheritance tree of the given object
(as shown in the following picture) and for each classes of the tree, it queries for a configuration for the given class.
That's why the configuration defined for java.util.Map interface is applied to java.util.HashMap object.
Existing Console Examples
The following list presents some projects which use the Browser framework in order to provide a graphical console.
In fact, these are various instances of the Browser framework.

|
-
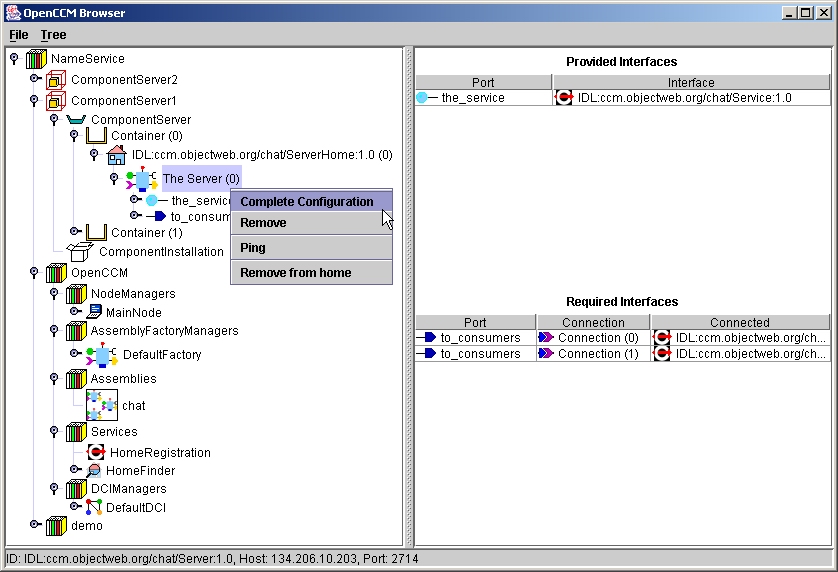
OpenCCM Management Console: The OpenCCM Browser is a graphical console tool for browsing
and interacting with CORBA components at runtime. This browser allows you to browse the CosNaming Service, the CosTrading Service, and the
Interface Repository if they are started. For example, you can deploy an application step by step, create components, connect them together,
introspect components connections.
|

|
-
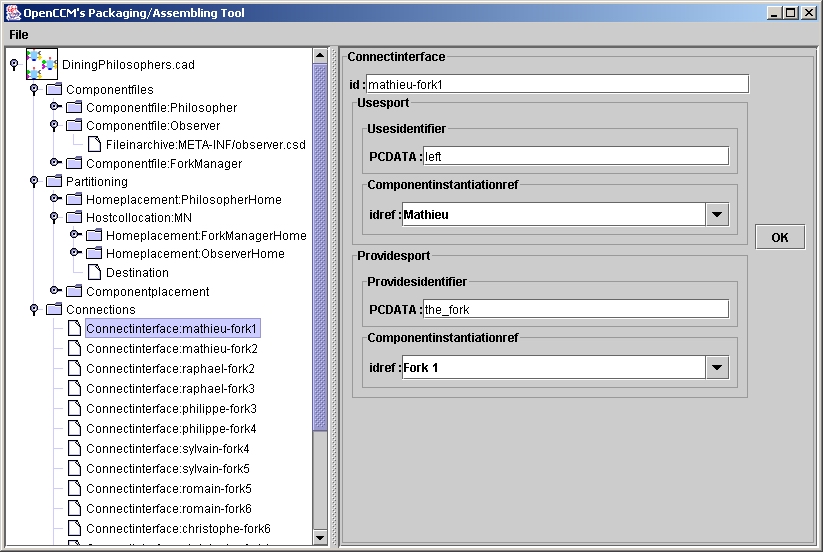
OpenCCM Packaging and Assembling tools: OpenCCM provides Graphical User
Interfaces to help developers writing the meta information needed by a CCM XML deployment.
Thanks to this graphical tool, you can easily browse the XML elements you have to inform in order to build a CCM application.
|

|
-
Apollon project: Apollon is a generation engine able to build
graphical user interfaces (GUI) from XML DTDs and customization models.
This makes the GUIs adapted to the edition of XML documents.
In this case, all the plug-ins are generated according to the XML DTD.
|

|
-
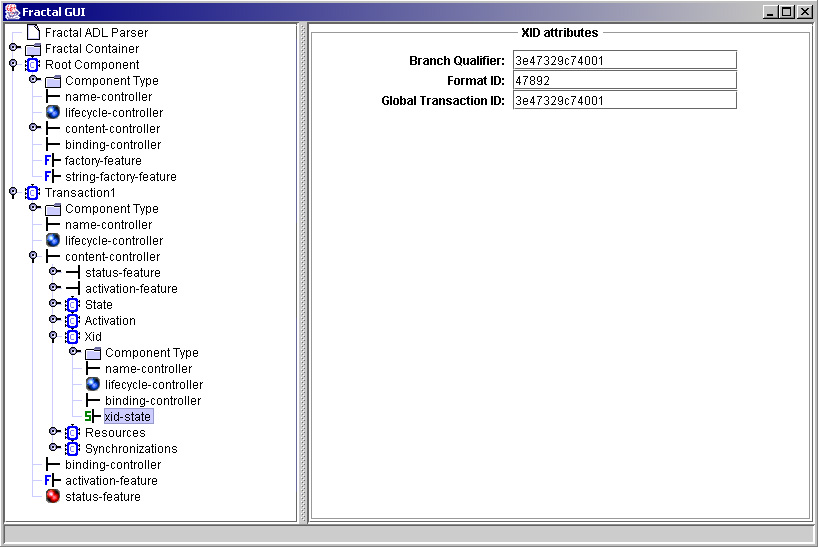
GoTM: The idea behind GoTM is to support a rich set of core services allowing
to build various personalities compliant to advanced transaction models or existing industrial standards. GoTM is based on the
Fractal Component Model. This console allows users to browse Fractal Components and more precisely to navigate through those components
interfaces and act on them.
|

|
-
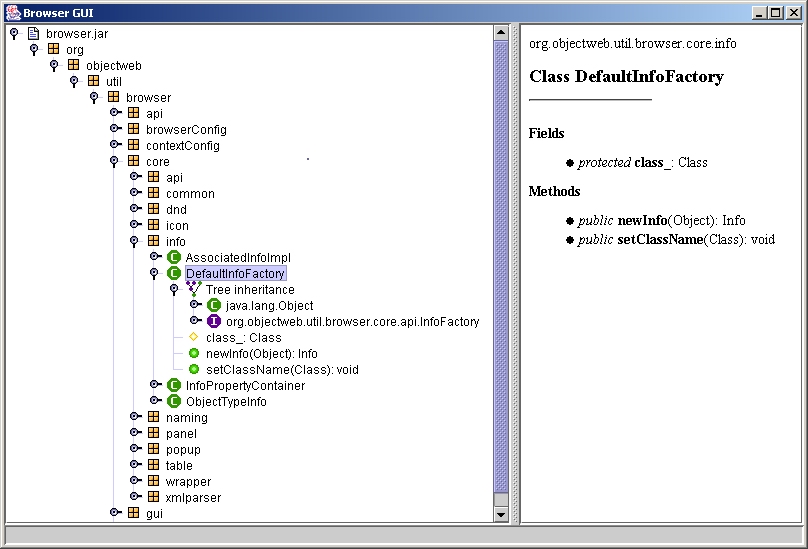
Java reflector plug-in: This console allows users to browse a Jar archive, its packages and for each class of a package,
displays its fields, methods and inner classes. It also displays the Java class inheritance tree.
The associated plug-in can be found in the example/reflector directory of the browser module.
|
| 
